Planners
Creating a Pack - Access & Egress
Providing accurate access and egress information is crucial for ensuring safe entry to and exit from work sites. Accurail offers flexible options to input this vital information. Let's explore how to effectively use this feature:
Access Points Map
Once you have confirmed your location information, an interactive map appears in the Access & Egress section. This map shows the ELR line geometry for your worksite and displays nearby access points as markers.
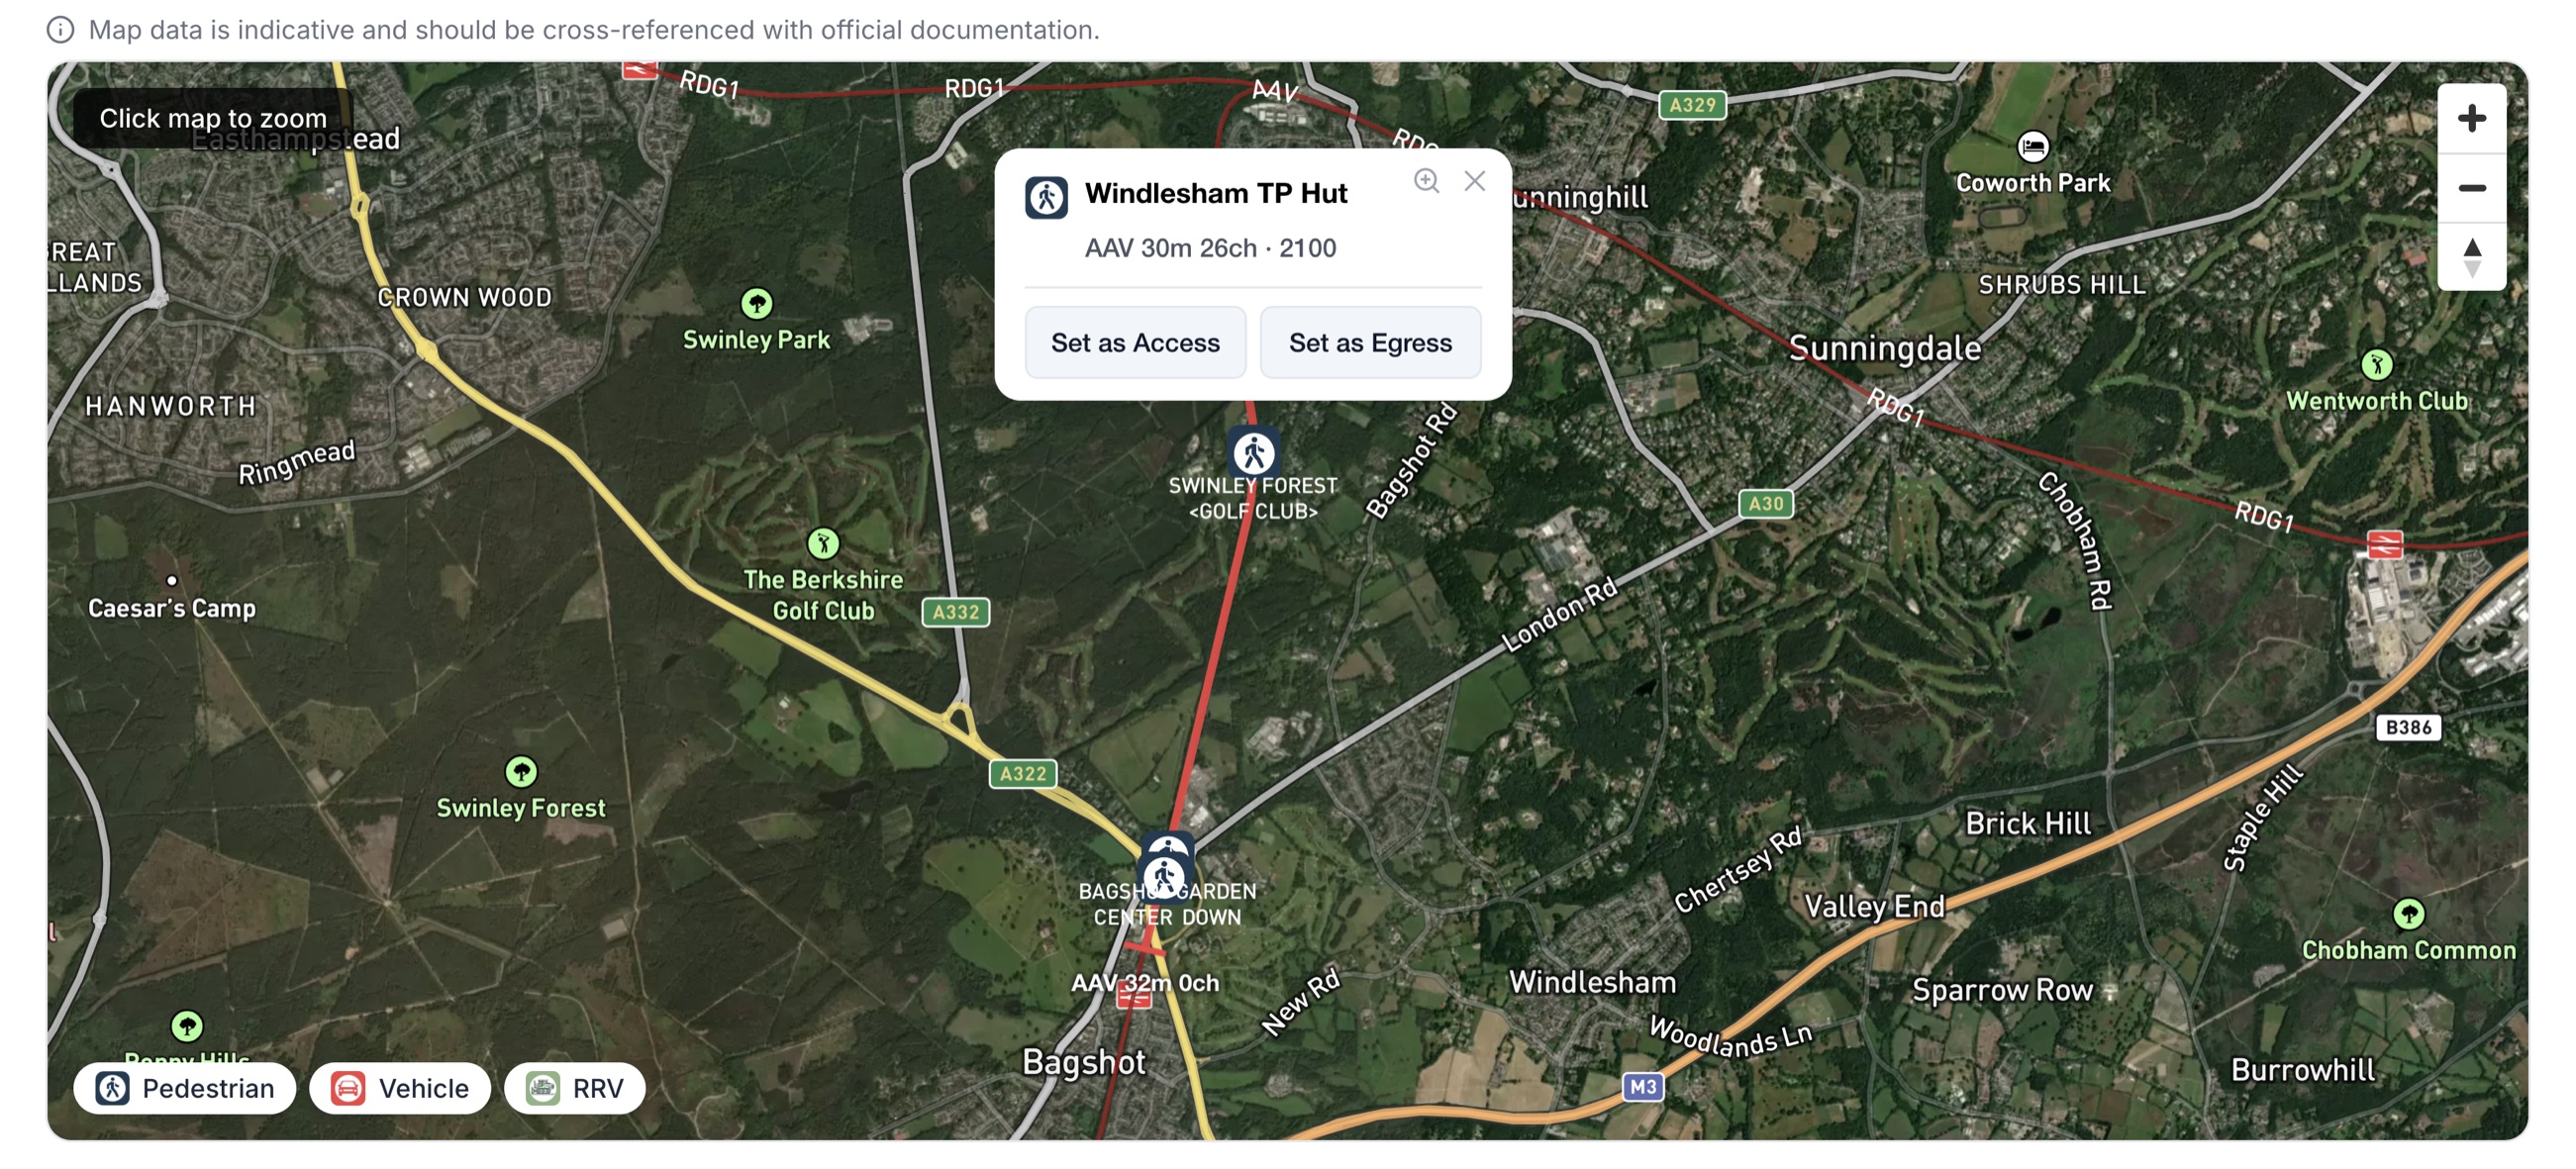
Using the Map
- The map automatically centres on your confirmed ELR location and highlights the relevant line section.
- Access point markers are displayed along the route. Hover over a marker to see its name and details.
- Click on a marker to open a popup with options to set it as your access or egress point.
- Use the filter buttons above the map to show or hide different access point types.
- Use the zoom reset button to return to the default view if you have panned or zoomed away.
The map is a visual aid to help you choose the most appropriate access and egress points relative to your worksite. Selecting a point on the map will update the dropdown selection automatically.
Official Access Points
By default, Accurail provides a comprehensive list of official access points from Network Rail (NWR). Here's what you need to know:
- These access points are pre-approved and well-documented locations for entering and exiting work sites.
- Selecting an official access point automatically pulls through additional useful information, such as the nearest hospital.
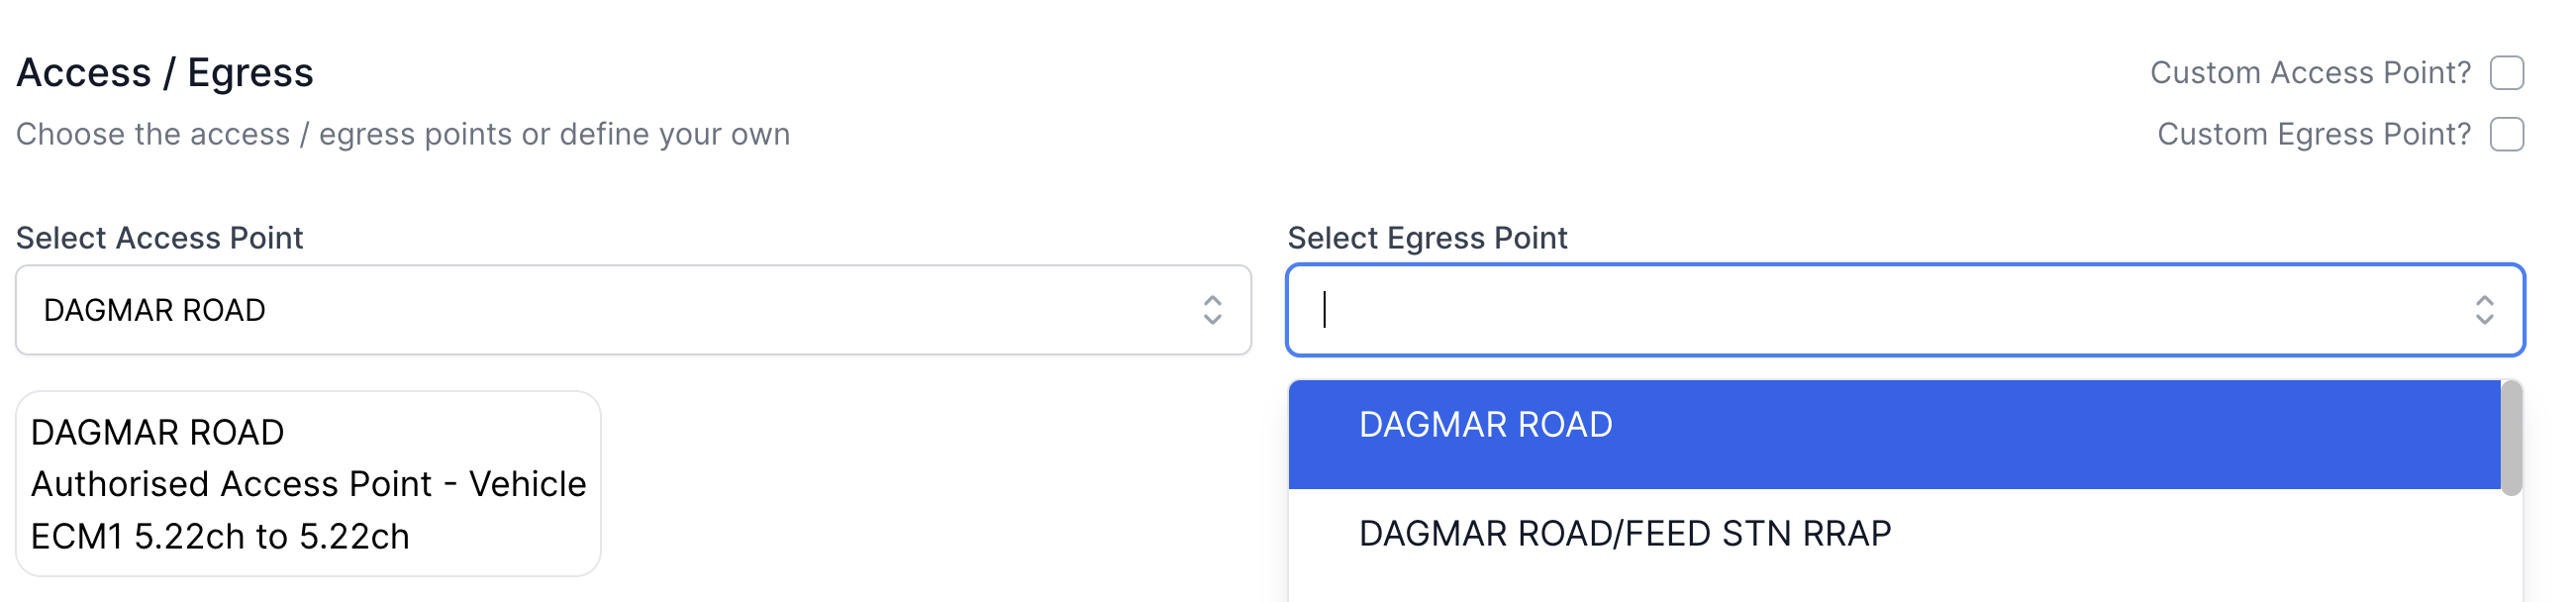
To select an official access point:
- Click on the dropdown menu in the Access & Egress section.
- Browse through the list or use the search function to find the appropriate access point.
- Select the relevant access point for your work site. This will also reveal the ELR and Location of the selected Access Point
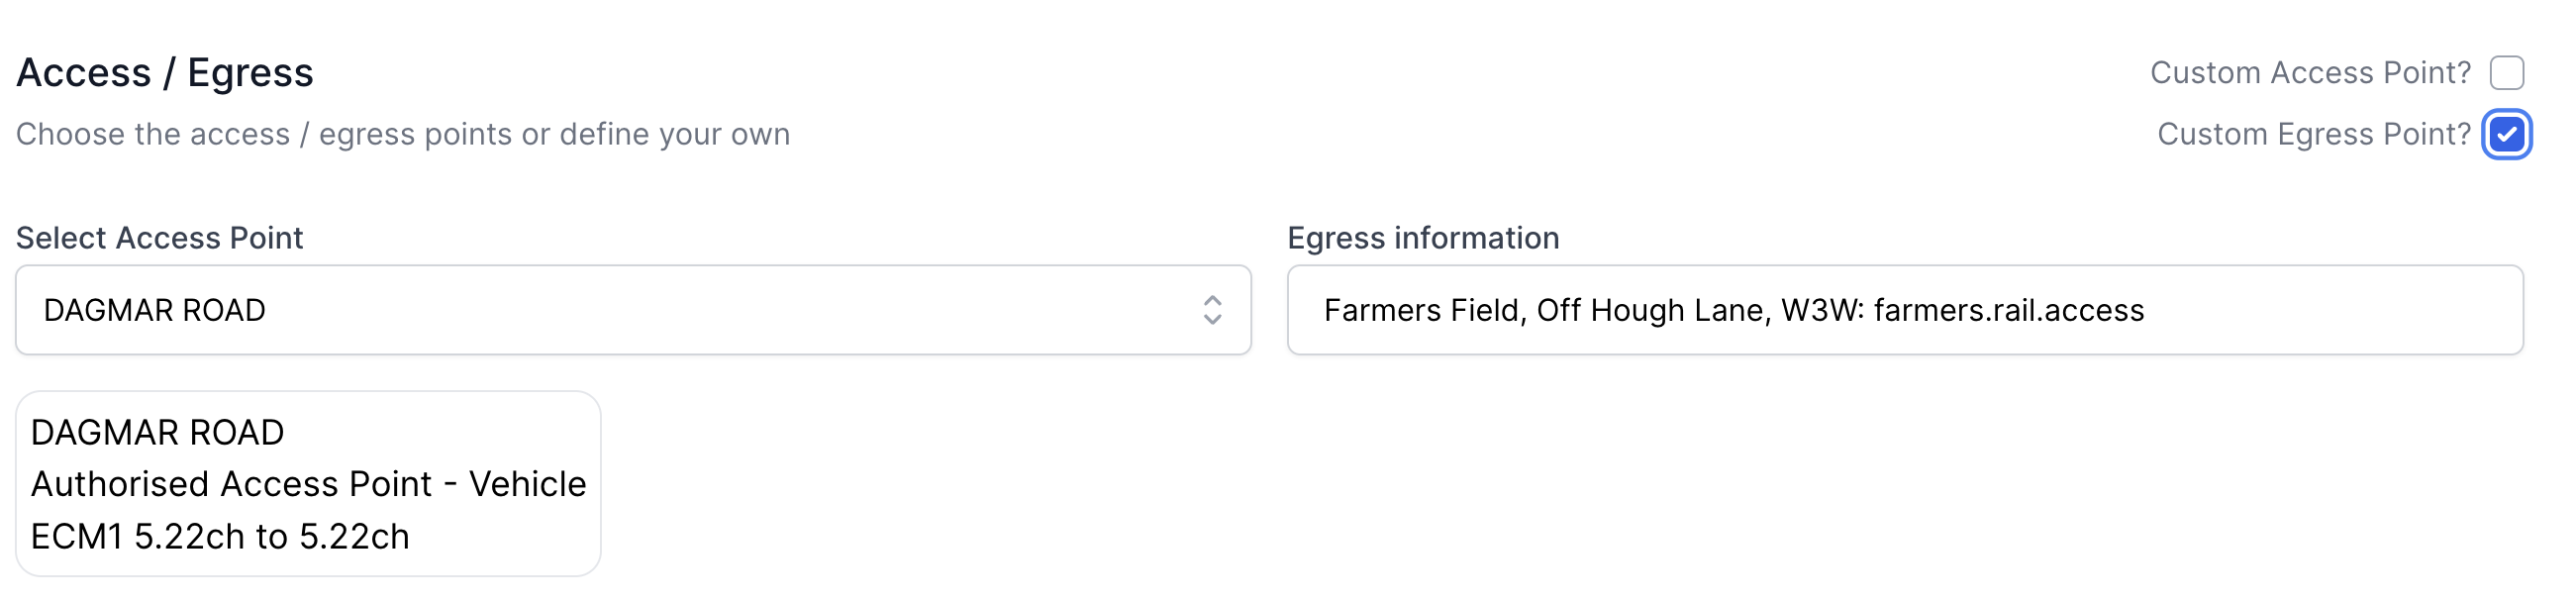
Custom Access Points (Free Text)
If the access point you need is not on the official list and you just want to type a description, you can use the free text option:
- Look for the "Custom Access" or "Custom Egress" checkbox.
- Tick the box to enable custom entry.
- The dropdown transforms into a free text field.
- Enter the details of your custom access or egress point.
When using a custom access point, the system won't automatically pull through nearest hospital information.
Submitting a New Access Point to the Company Map
If the access point does not exist yet and you want to add it properly to your company's map so others can use it too, you can submit it as a new asset without leaving the pack creation flow.
- Tick the Custom Access Point? or Custom Egress Point? checkbox to reveal the free text field.
- Click the Create New button that appears next to the field.
- The submission form opens, pre-filled with the pack's ELR and mileage bounds so the location is already scoped to your work site.
- Complete the form and submit. Once submitted, the new access point is automatically selected in the dropdown and the custom checkbox resets.

Pending Status
Your new access point will be in Pending status until an approver reviews it - but you can still reference it in your pack immediately. See Submitting Assets for full details on the submission form.
Editing Your Pending Access Points
While your submitted access point is still Pending, you can edit it directly from the map without needing approval:
- Navigate to the Company Map.
- Tap or click the marker for your pending access point.
- Click Edit in the detail panel.
- Make your changes and save.
This lets you correct mistakes or add more detail while the submission is still under review.
Once your access point has been Approved, it becomes visible to everyone in the company and direct edits are no longer available. At that point, use Suggest an Edit to propose changes, which will go through the approval process.
Multiple Access Points
As of right now, there is no functionality to include multiple official access points. This could be achieved by writing the names of the access points in the custom box.
Best Practices for Custom Access Points
If you need to use a custom access point but still want to include nearest hospital information:
- First, select an official access point close to your actual location.
- This will pull through the nearest hospital data.
- Then, change to a custom access point and enter your specific details.
This method ensures you have both accurate access information and important emergency details.
Additional Tips
- Always verify the accuracy of custom access points before finalising your SWP.
- If using a custom access point, consider adding extra details in the free text field, such as landmarks or the What 3 Words location.
- Regularly review and update your commonly used custom access points, as site conditions may change over time.
By providing thorough and accurate access and egress information, you're contributing to a safer and more efficient work environment. Remember, the few extra moments it takes to input this information correctly could make a crucial difference in an emergency situation.